Game Designer
Level Design Project
Team Size
1
Role
Level Designer
Duration
Mar 2022 - May 2022
This was a level design class taken at DigiPen where I designed and built a 3D first person level in Unity.
This project was a 5 minute first-person experience built for a class at DigiPen during my first year.
During the project, I playtested the experience with 8 First Time Users.
I was responsible for 3D modeling any assets I required to use in the game.
I was not allowed to implement any gameplay beyond simple movement.
If you want to hear the full story - read on!
Design
Where I planned a level
Beginning With Constraints
For my final project in my first level design course at DigiPen, we had to create an engaging 3D level that led the player from beginning to end using only landmarks, lighting, and audio. I had work under a number of technical and design constraints:
-
Include both exterior and interior spaces
-
Contain 3 composed shots
-
Have no gameplay or mechanics other than player movement
Essentially, our project had to be an engaging walking simulator built in either Unity or Unreal.
Creating A Plan
Considering that we had 3 weeks to complete this project, creating level design documentation to help inform my design was crucial for staying on scope. My level plan included:
-
A level description
-
Level objectives and obstacles (what the player would be interacting with)
-
Level focal points (the level break down)
-
Mood board (to help keep a cohesive theme throughout the level)
-
Required asset list (to determine the labor required to create the set dressing)
-
A visual layout (a plan for what the space would look like)
A wireframe for the opening menu of our prototype


My preliminary level planning documentation for the Level Design Final Project
I examined 10 potential level design ideas, including the space themed one in the images above, evaluating each one according to scope and potential. However, I wanted to incorporate a unique and abstract narrative into my level design. I ended up settling on an idea where a player navigates their own interpretation of reality in their mind. This way my level's design and assets didn't have to be limited to what made sense in the real world.
Implementation
Where I built the level
Narrative Driven Level Design
Because one of our level design constraints required that we had 3 composed shots (iconic moments in our level), I decided that if I wanted to tell a narrative using level design, it would be best to leverage the 3-act structure narrative framework when designing my level.
-
ACT I: The player is introduced to the game controls and their environment, and their motivation
-
ACT II: The player uses the game controls the navigate the level space while the character gets overwhelmed
-
ACT III: The player makes a final push using all of the game mechanics they've learned and escapes
Each act would need their own composed shot, and the player would have to be guided towards the end of each act using lighting, audio, and visuals.
Player Guidance
I had a number of rules I employed throughout my project to ensure that players knew where they had to go while picking up the narrative as they went:
-
The player should see their "objective" at the beginning of each act
-
Incrementally show, or "breadcrumb" the player towards their goal
-
Keep the critical path linear, but allow players to engage with the world at "narrative bottlenecks"
-
Use lighting and visual/audio cues judiciously, as to not overwhelm the player with feedback
By setting internal design guidelines, I would keep the level experience feeling consistent while limiting player confusion. I was ready to build out each level segment!
Building Act I
When I was building the segment for Act I, I used contrast and perspective to guide the player towards the next piece of the path. For example the door has a bright light on it and the fence on both sides of the player provide leading lines to the door.

The view of the player on level start
Passing through the door, the player once again sees a focal point (the purple teleporter) out in the distance. Another objective! As the player moves forward, platforms with text appear that require a series of short jumps that vary slightly in elevation. This allows the player to focus on reading the text prompts when they reach each platform. The text prompts are meant to help the player understand that this abstract environment is a view inside the character's mind. When the player enters the open room through the teleporter, it marks the end of Act I and fully establishes the fact that the player is inside the character's mind.

Viewing the next objective from the door.
Small jumps leading to the teleporter

Physics objects to push around in the narrative bottleneck.
Viewing the next objective from the door.
Building Act II
I made sure to follow the basic rules I had set for myself at the beginning of the project to make sure Act I felt consistent with Act II and limiting player confusion. For example, I used lighting and contrast to bring the player's eye to Act II's objective in the distance.

The view of the player on the start of Act II
Act II built upon the player's understanding of the level from Act I in many ways. This helped differentiate Act II from Act I while keeping the visuals and guidance familiar.
-
I elaborated on the path the player must follow, and made it wind left and right
-
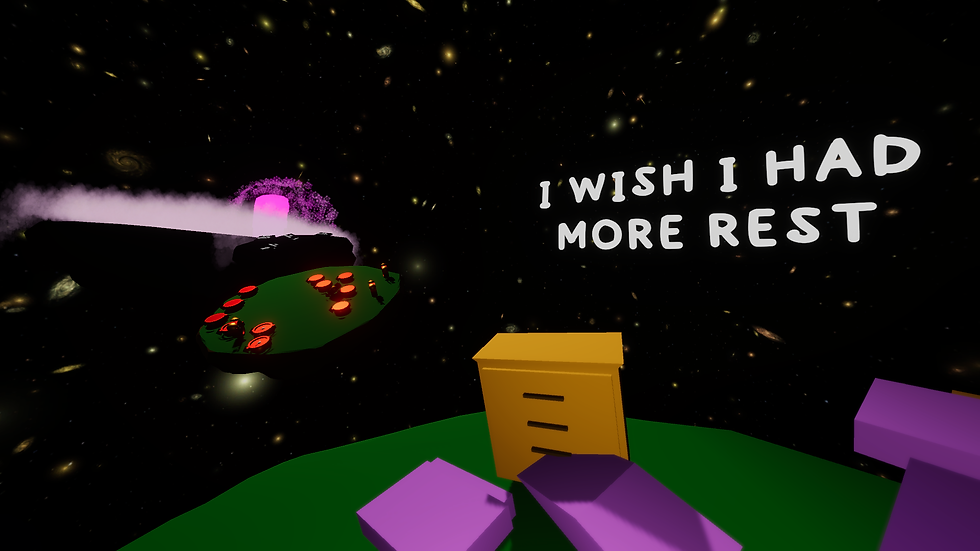
The platforms glowed with a bright pink hue, rather than being standard green and brown
-
Objects now appeared floating in space along with the narrative text
-
There was a new segment that expanded as the player walked on it
-
Act II was the first time the character shows a desire to leave
I made sure to follow the basic rules I had set for myself at the beginning of the project to make sure Act I felt consistent with Act II and limiting player confusion.

Updated platform visuals for Act II

Breadcrumbing to lead the player along the jumps

Objective for Act II
Updated platform visuals for Act II
Building Act III
I started Act III with a clear view of the objective, leveraging a different color (yellow) to contrast against the other game objects. I also used motion in the "growing staircase" to lead the player's eye to the teleporter at the top.

The view of the objective on the start of Act III
Act III's purpose was to bring the gameplay to a climax and resolution. To do this within the constraints of what essentially was a "walking simulator" I decided to combine all the objects from Act I and II and amplify the lighting and visuals using Unity's Universal Render Pipeline for an "escape sequence", leading into a final teleportation to an area with no visual flair for a resolution.

Last stretch of jumps leading to objective

The final climactic climb for Act III

The room made for the resolution of Act III
Last stretch of jumps leading to objective
Reflection
Where I Look Back
Lessons Learned
This was my first level design project at DigiPen and I consider it a success! There were many lessons learned during this project that I will be carrying over to my projects in the future.
-
Design is better with constraints. This project had constraints that were imposed by the project requirements, but by applying my own constraints on how I approached both the technical and creative parts of the project, I reduced the risk of scope creep and also made the experience more consistent overall.
-
Good level design capitalizes on opportunities. By recognizing the capabilities of the engine I was working with (through research and trial and error), I was able to enhance parts of the level without needing to add new game systems that would otherwise require a large overhead.
-
I am my own worst playtester. By opting to playtest my level with First Time Users, I found many issues that I otherwise would not have been had I tried to playtest my level myself. There were many technical bugs and level design issues that were revealed through these playtests that, when fixed, significantly enhanced the experience.
-
Familiar, but different. It was easy to fall into the trap of trying to create environments that varied significantly from each other as a means of surprising players. However, this project taught me that establishing themes and visuals that the player finds familiar is just as important as providing variety. Confusion is the ultimate enemy of any level designer!